Team Foundation Server 2010 Installation (ALM-II)
In the previous post in this series we discussed the need to follow an application lifecycle management methodology for managing Microsoft Dynamics AX 2012 solutions. We also saw that the main tool to manage the technical side of this lifecycle is Microsoft Team Foundation Server. In this installment we will see how to install and configure the environment to start working.
Prerequisites
I assume we already have a working Microsoft Dynamics AX 2012 environment for testing, which means the following prerequisites are installed:
- Microsoft Dynamics AX 2012
- Microsoft SQL Server
- Microsoft SQL Server Reporting Services (optional)
- Microsoft SQL Server Analysis Services (optional)
For a full Team Foundation Server installation, SharePoint services are also required. These may or may not already be installed in our Microsoft Dynamics AX 2012 environment. In my case they were not, so I installed:
And for installing Team Foundation Server itself, I am going to install:
- Microsoft SQL Server - Client Tools Connectivity (if not installed on this server)
- Microsoft Team Foundation Server 2010
A Visual Studio instance is also useful for project maintenance tasks. In typical Microsoft Dynamics AX 2012 setups, we usually have Visual Studio 2008 on the Microsoft SQL Server machine (Visual Studio 2008 BIDS) and Visual Studio 2010 on the machine where we develop for Microsoft Dynamics AX 2012. The connection works with both versions and does not affect projects created on the server, but to connect from Visual Studio 2008 BIDS you must install the following updates:
- Visual Studio Team System 2008 Team Explorer (download)
- Microsoft Visual Studio 2008 SP1 (download) (updates both VS2008 and Team Explorer 2008 to SP1)
- VSTS 2008 SP1 Forward Compatibility Update for TFS 2010 (download) (required)
TFS 2010 Installation and Configuration
WSS installation is relatively simple, as is Team Explorer installation (the update listed above is mandatory), so we will focus on installing Team Foundation Server 2010. For production environments, the recommendation is to install it on a dedicated server, but for testing it can be installed on another server. Likewise, we will later see that it is also recommended to use a dedicated server for the Build service, although for now I am not going to install it. I will not go into detailed installation steps because it is a simple and intuitive setup wizard:
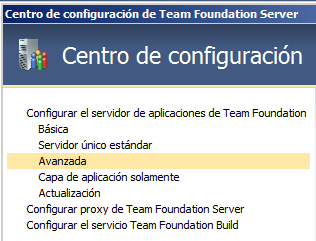
After installing TFS2010 services, we need to run the configuration wizard (it starts automatically after first installation) and, unless we meet the limited prerequisites for a standard setup, we choose Advanced server configuration mode:
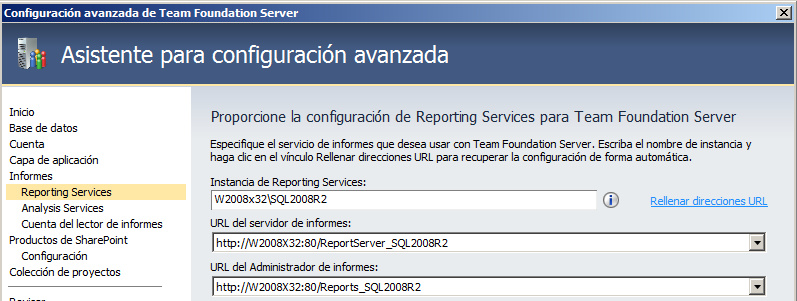
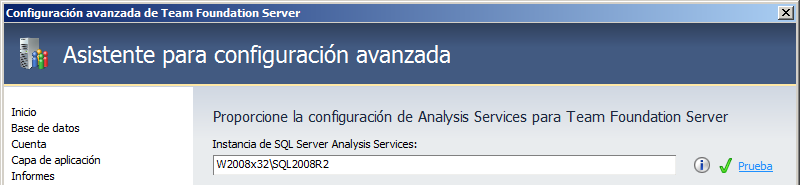
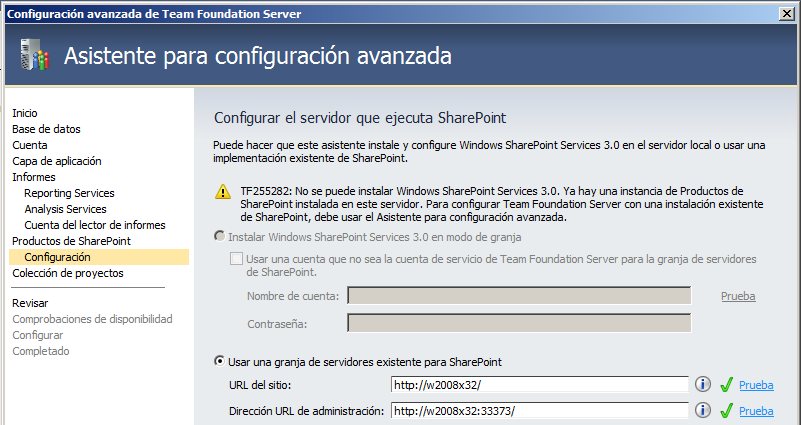
This wizard asks for the address and credentials to connect to SQL Server instances:
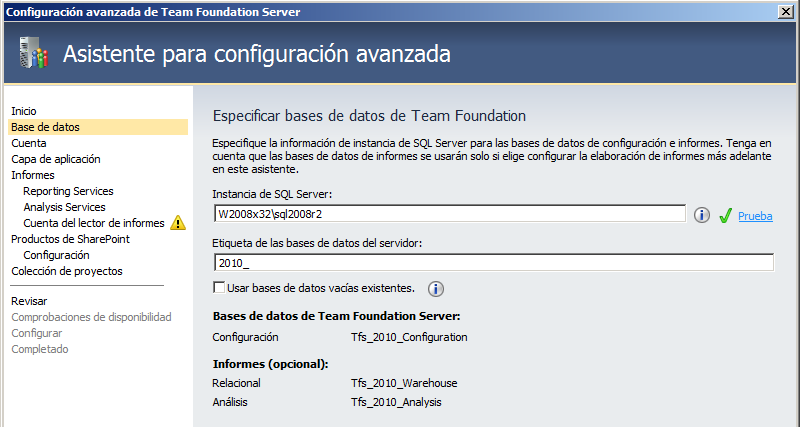
SQL Server Reporting Services
SQL Server Analysis Services
Windows SharePoint Services
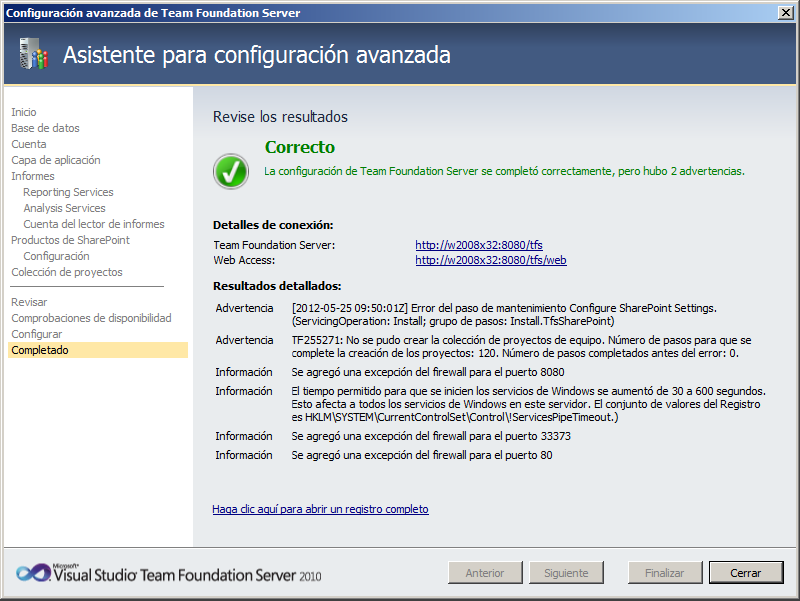
And the result should look like this:
As shown in the log, in my case there was an error creating the project collection, so I proceeded to create it manually:
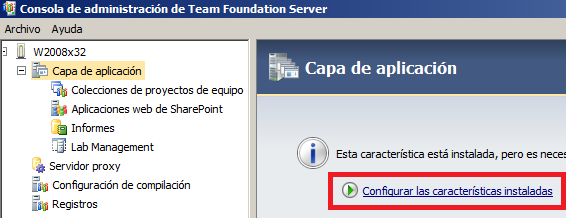
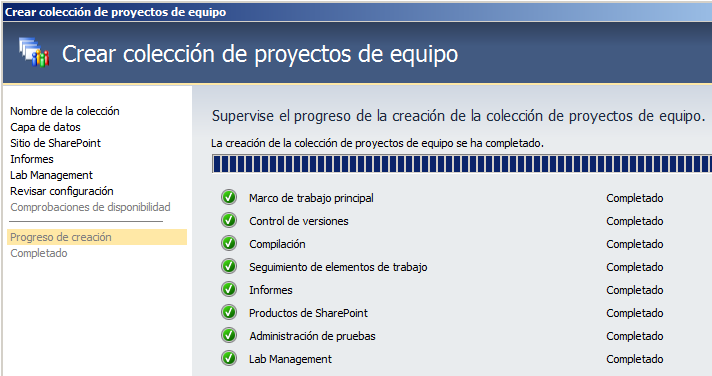
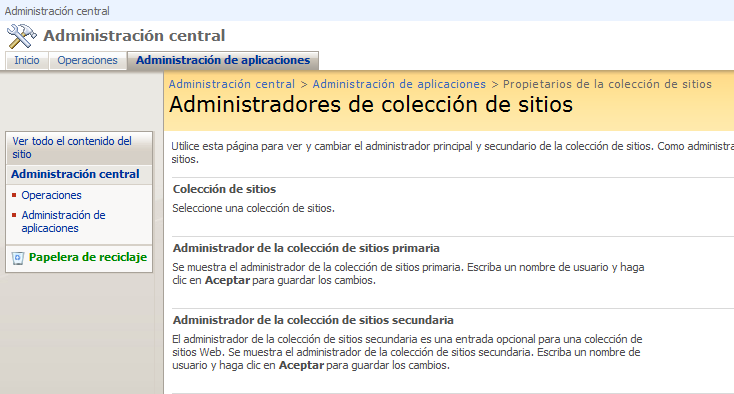
Create a Project Collection
The next step is creating a project collection to group projects that will be stored on the server. Start this wizard from the Team Project Collections node and the Create Collection button. The wizard is not too complex, so after assigning a collection name we should get a result similar to this:
In my case, it did not work on the first try because I had to adjust permissions for the user running TFS2010 services on the SharePoint site created to store project collections. Information is available at: Set Administrator Permissions for Team Project Collections.
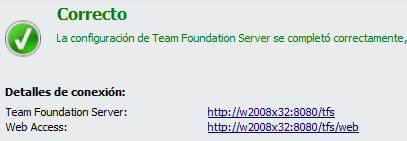
Once installation finishes, the wizard itself shows the useful URLs that were created to manage our projects. The first is the URL we will use in programs that connect to this server (including AX), and the second is the URL we open in a browser to manage projects via web.
Test the Installation
To test the installation, browse to one of the URLs provided by the installer and verify the system is working. We should see our collection list (empty by default, I already created a couple) and, for now, no projects:

Notes About the Version
These articles and the next ones are based on a Team Foundation Server 2010 connection because this is the version supported by Microsoft Dynamics AX 2012. It is worth experimenting with the next version of the suite, which can already be tested at the following links, both traditional edition and the new cloud modality (or as a service, currently fashionable):
- Visual Studio 2012 Application Lifecycle Management Virtual Machine and Hands-on-Labs / Demo Scripts
- Team Foundation Service
- TFS connection string using TFS preview
Microsoft Dynamics AX 2012 Configuration
In the next chapter we will put our newly installed Microsoft Team Foundation Server to work, create our project and some tasks, and see how to use this tool as the front-end of our methodology. We were talking about methodologies, remember? :)
References
- Connect to TFS2010 Server using VS 2008 Client
- TFS 2010: What Service Packs and Hotfixes Should I Install?
- Set Administrator Permissions for Team Project Collections
Posts in this series
- Automatic BUILD Processes with TFS and AX 2012 (2/2) (ALM-X)
- Automatic BUILD Processes with TFS and AX 2012 (1/2) (ALM-IX)
- Version Control in Microsoft Dynamics AX 2012 Using Team Foundation Server Branches (ALM-VII)
- Source Code Control with TFS in Microsoft Dynamics AX 2012 (ALM-VI)
- Microsoft Dynamics AX 2012 ALM with Team Foundation Server (ALM-III)
- Team Foundation Server 2010 Installation (ALM-II)
- Microsoft Dynamics AX 2012 Application Lifecycle Management (ALM-I)