Prepare Yourself for the New Microsoft Dynamics AX
We have already commented several times that Lifecycle Services is going to be a fundamental piece when managing the infrastructure of the new Microsoft Dynamics AX. Tasks such as deploying new environments, modifications, updates, monitoring, etc. will be LCS’s responsibility in the short term, so while we wait for the public preview launch, we can start preparing our LCS to have it ready on launch day.
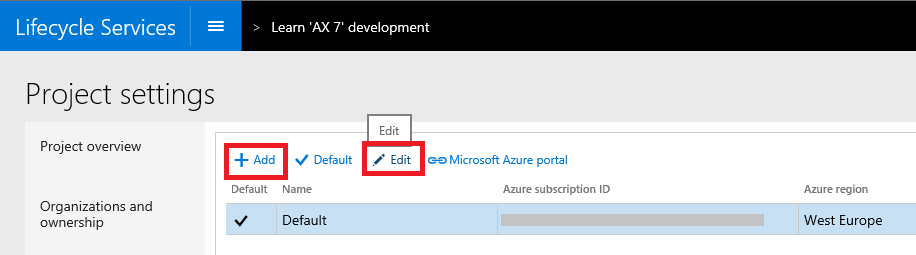
Connect LCS with Azure Subscriptions
The first thing we need to do is connect our LCS project to our Azure subscriptions, which will be essential to deploy our work environments, including development, testing, demo, build, etc.
- In our project options we go to Azure connectors and add a new subscription (or edit an existing one, if necessary).
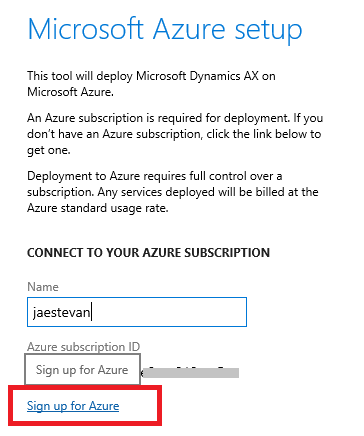
- We give it an informative name and click on Sign up for Azure. Next we are redirected to the Azure website to provide a valid username and password.
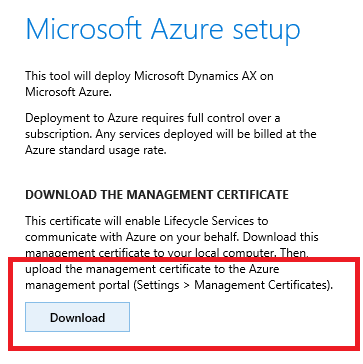
- Finally if the connection is correct we can download an administration certificate that we will save in a safe place.
Add a new subscription
Connect with Azure
Download the certificate
- Next we connect to the management portal of our Azure subscription and go to the subscription settings, where we have a section to store these certificates. Here we upload the certificate we just obtained from LCS.
- And that’s it, this way LCS and Azure are authenticated to be able to perform tasks with each other.
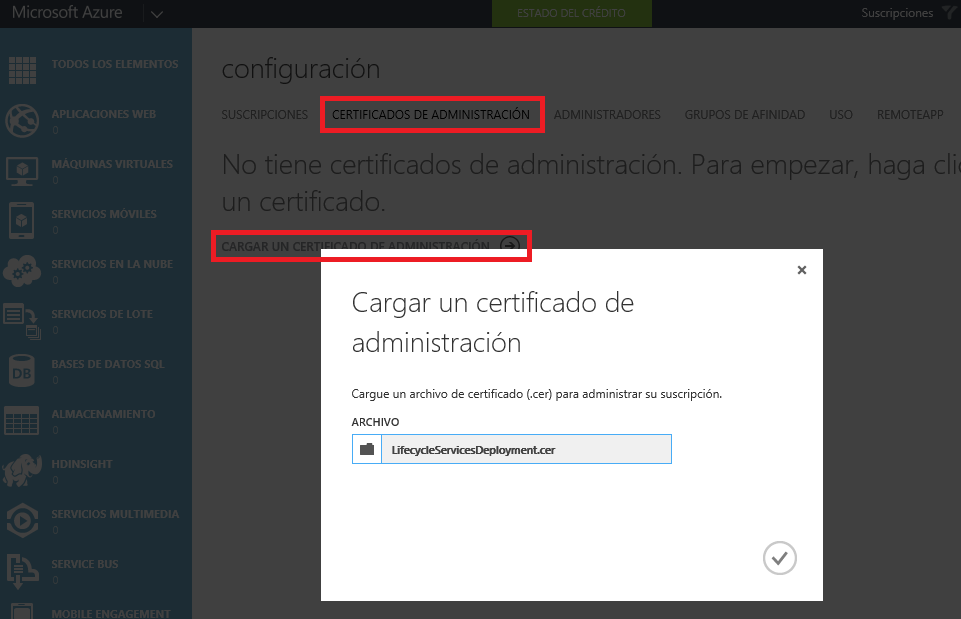
Import the certificate in Azure

Done!
Connect LCS with Visual Studio Team Services
To manage our code in the preview we will use the Team Foundation Server code manager in the cloud called Visual Studio Team Services (VSTS, formerly Visual Studio Online, and before that TFS Online). To connect our LCS with VSTS the first thing we need to do is create a token in VSO itself, we’ll also take the opportunity to create a Team Project if we don’t already have one:
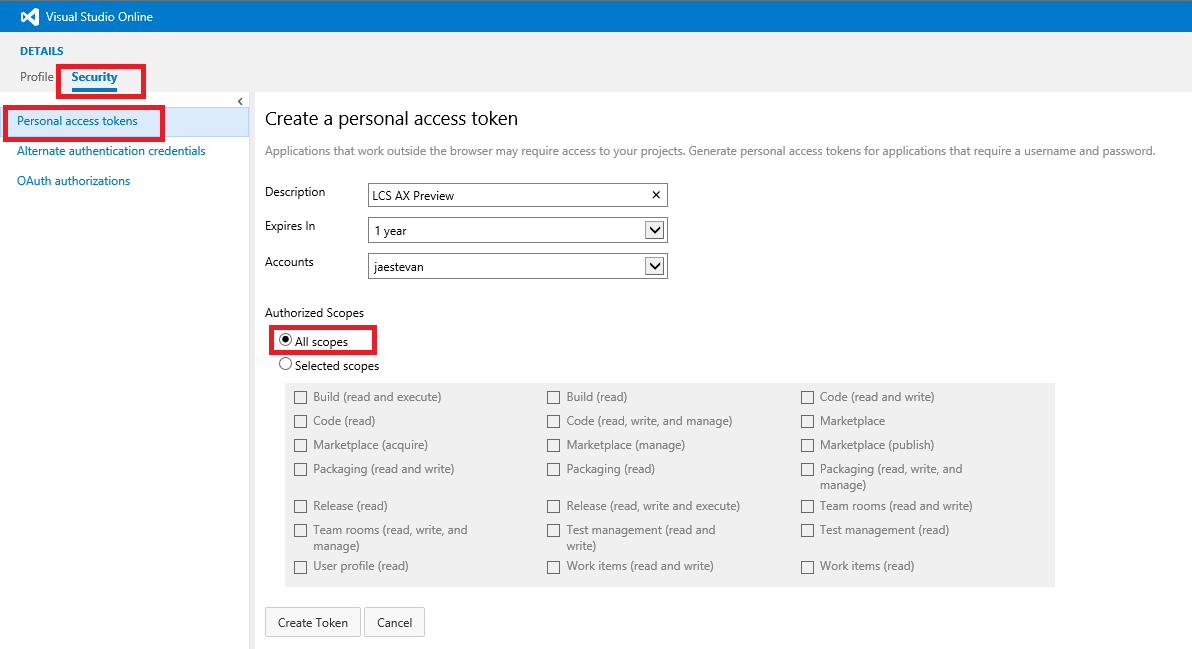
Create an access token in VSO
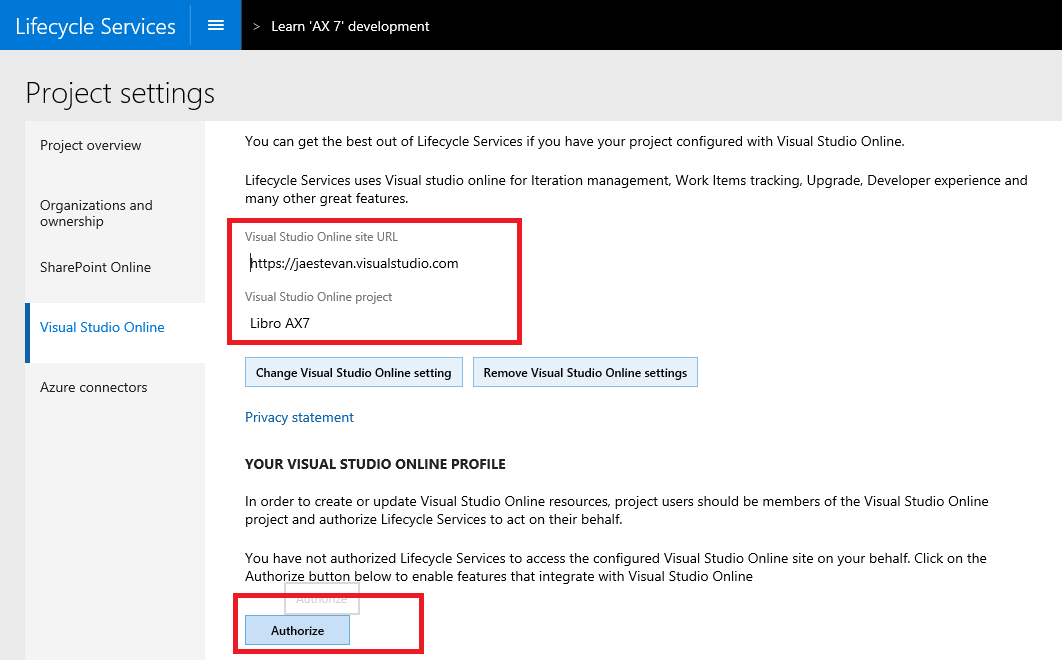
Next we go to LCS and start the process to configure Visual Studio Online and enter our URL and the token we just generated. Next, the wizard allows us to choose one of the projects created in VSO that will be linked to the active project in LCS:
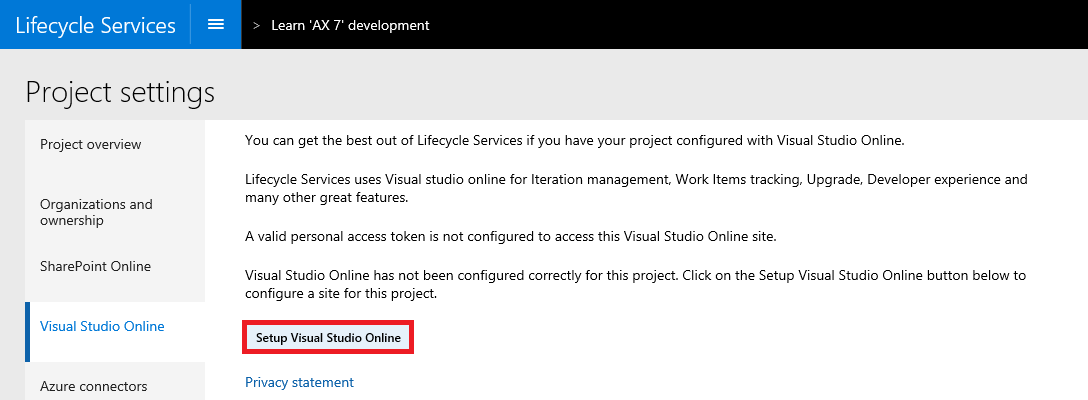
Run the setup wizard
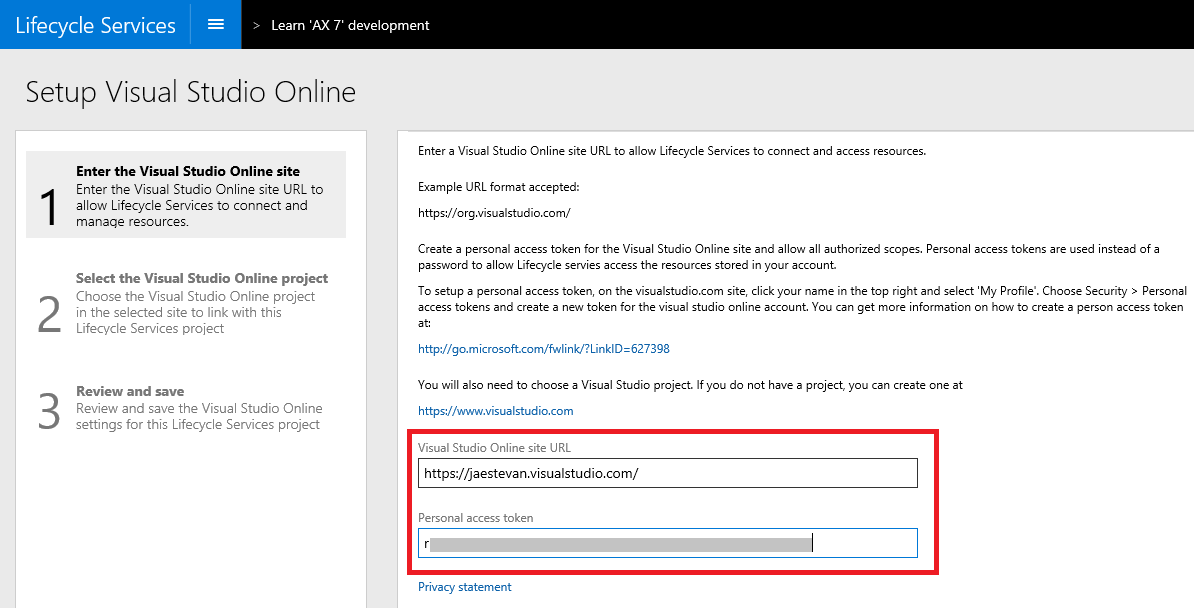
Enter our URL and access token
Once our VSO instance is connected, we must authorize our user to make changes, for which we click the Authorize button and follow the steps in the authentication process. Finally our user is authorized to make changes to the Team Project from LCS which will allow, for example, LCS to create Work Items in VSO automatically:
Run the authorization wizard
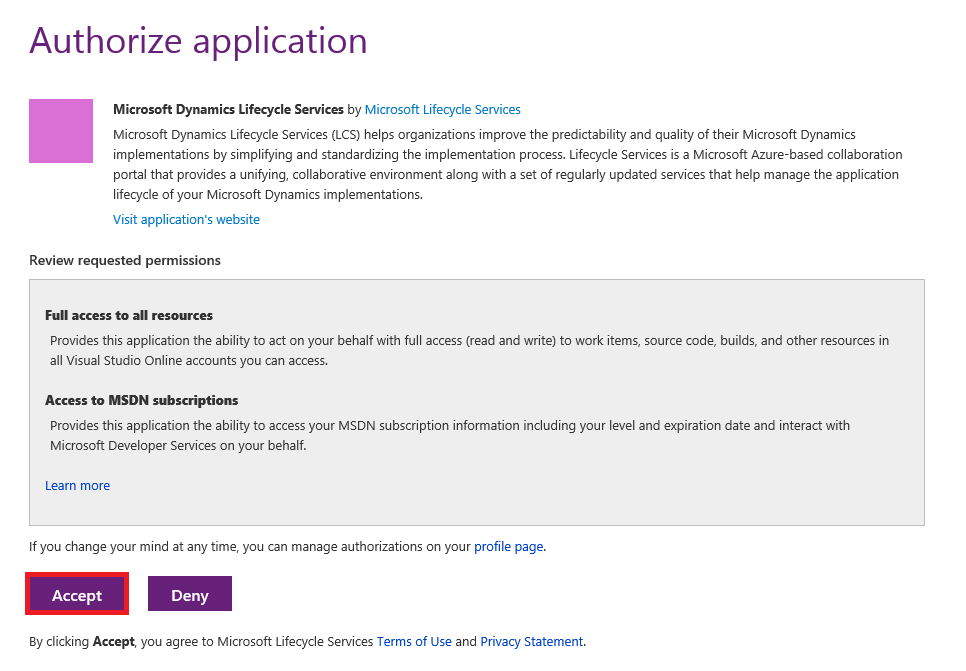
Follow the OAuth process steps
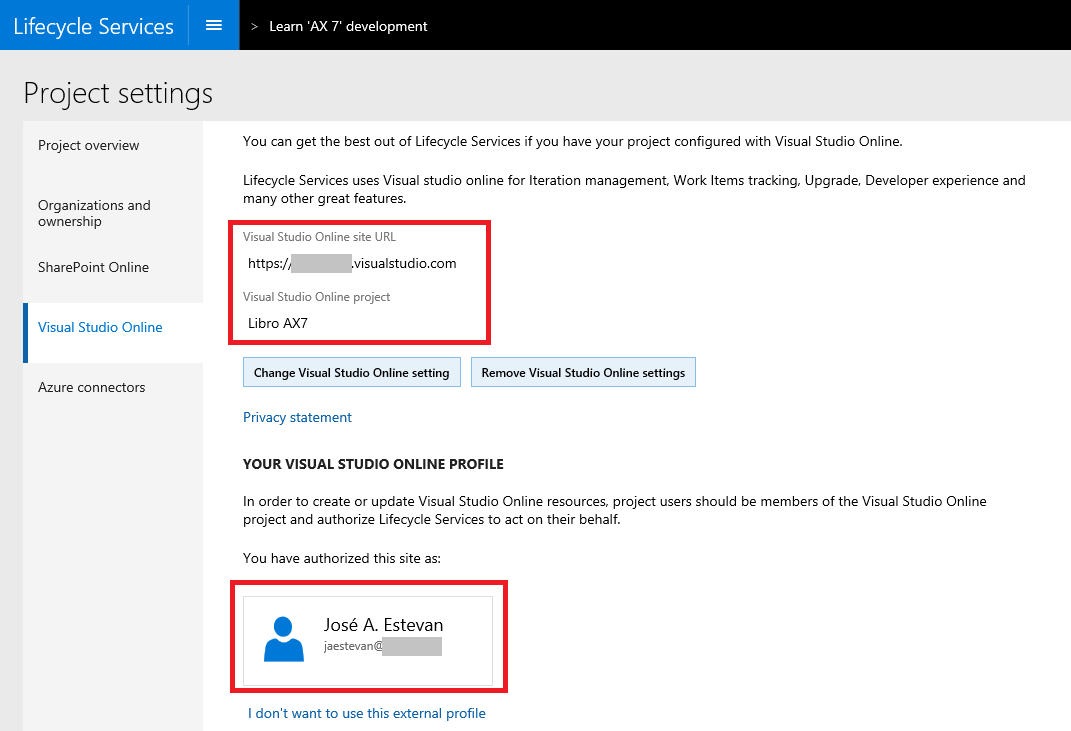
Done!
And we’re already ready to start deploying environments from our LCS :)
More information on the official LCS blog:
IMPORTANT!!: This process was performed using a preliminary version of LCS so it’s possible that in the final version the process may be slightly different.