Automatic BUILD Processes with TFS and AX 2012 (2/2) (ALM-X)
In the previous article in this series we defined the main process to configure a Microsoft Dynamics AX 2012 Build in TFS, in summary:
- Install and configure the necessary TFS components on the build server (Agent, Controller, etc.).
- Create a new project with custom activities and the default template.
- Upload all of this to the source code repository in TFS or Team Services so the Controller can access them.
- Add these references to Visual Studio so it recognizes the new activities.
- Create a new Build definition using the downloaded template.
We were left executing this newly created Build definition with all options, activities and default template, and after which we received an error. Frustrating, isn’t it? It may be, but if you think about it, it’s quite logical, let’s see:
A Build is nothing more than a workflow that executes a series of steps in a certain order. This workflow is the Template that we have downloaded, a file with XAML extension that, if we have followed all the steps so far, we can include in a Visual Studio project or solution and edit it from there, and that looks like this:
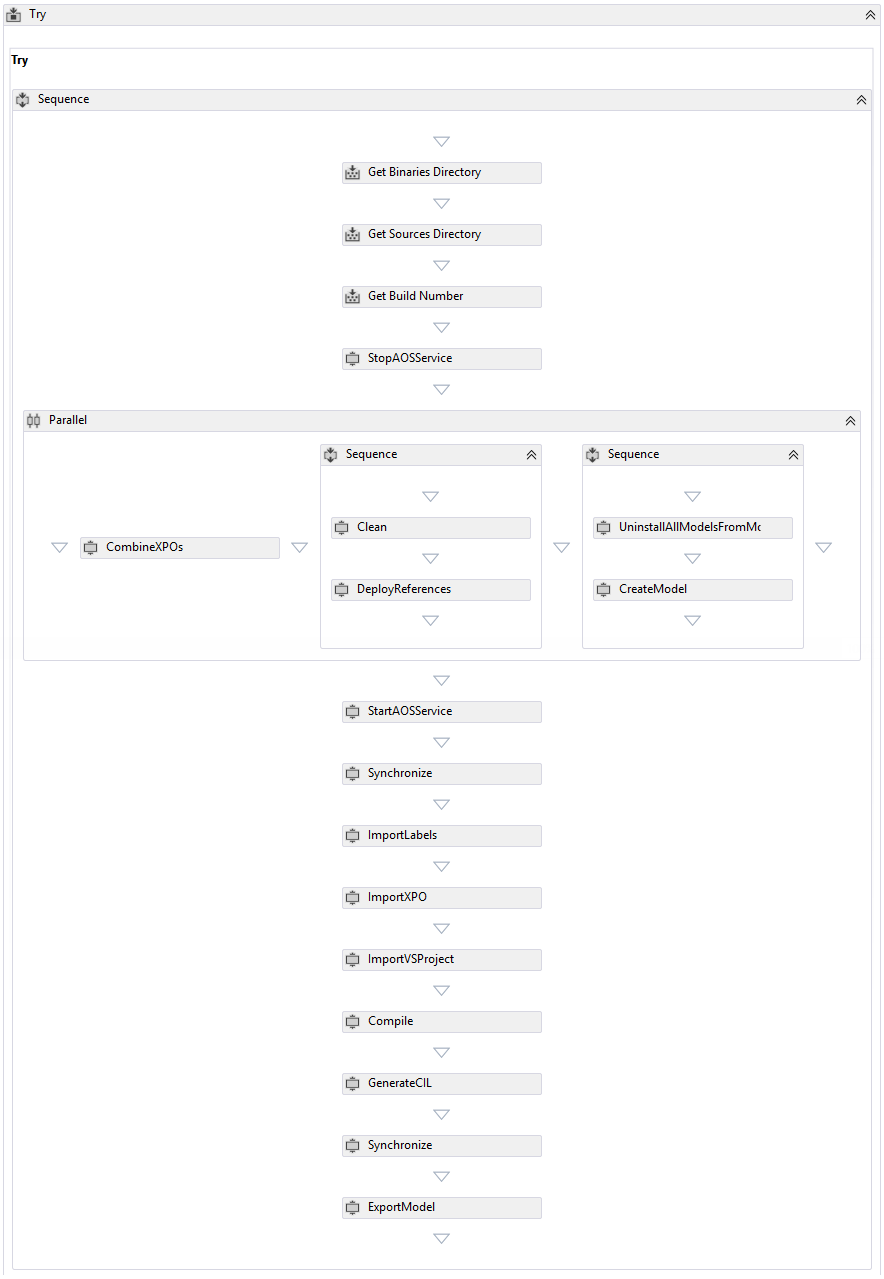
This template is composed of nodes that represent the actions that will be executed, including both default system actions (basically those that control the flow of execution), and new actions that we have added through the assemblies we have downloaded from codeplex, we call these nodes or actions Activities.
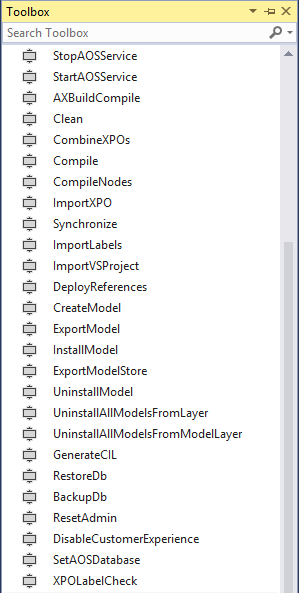
These activities perform specific and concrete tasks such as executing a PowerShell script, controlling the flow by allowing conditions (if) or loops, or in our case things like compiling X++ code, compiling CIL, synchronizing the AX database, handling models, etc., they look like this in the Visual Studio toolbox:
This is why a generic template downloaded from the internet is unlikely to work on the first try, as happened to us in the previous chapter. This workflow must be adapted to our environments, to our servers, we must specify whether the steps are correct and, even if they were, configure certain specific aspects in each case such as the name of the servers, the disk paths where to store the objects that the build handles (XPO files for example), etc.
In the previous image I showed the default workflow that Joris shares on his website, which is a good starting point to get started, next I’ll show you a workflow used in a real environment so you can see the difference, and the power it gives us to modify exactly how we want to build our application:

As I said, if we have followed the steps of the previous articles in this series, we can include the downloaded template in a Visual Studio project with the correct references to be able to edit it. We’ll see the workflow in the main Visual Studio window, the activities we can drag and drop onto the workflow in the Toolbox window (show it from the View menu if not visible) and each of the activities will show us its properties, which will logically be different depending on the type of activity:
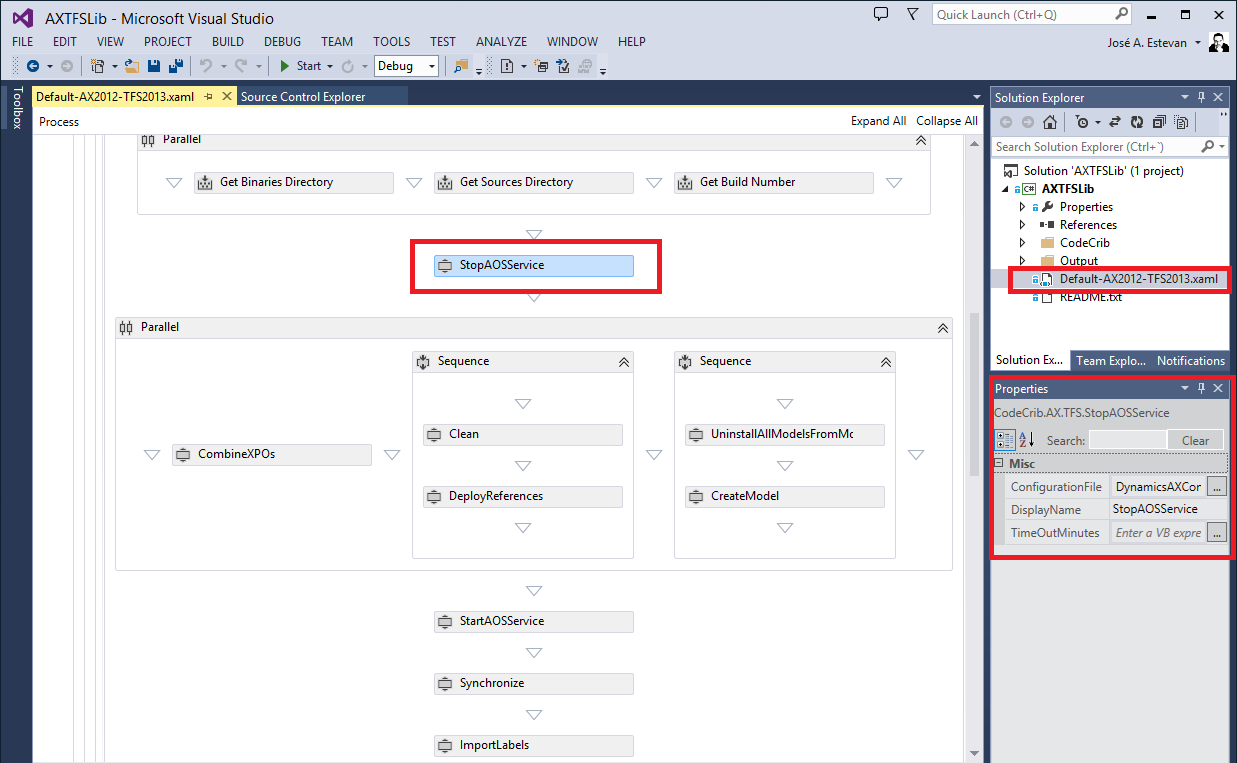
Joris did a good job designing the activities, so all those that have to do with AX use parameters consistent with the rest, receiving common parameters that we can store in process variables to facilitate maintenance, whether internal variables that the process can use, or input parameters that it receives externally, so we can change the behavior of the Build without having to modify the template each time:
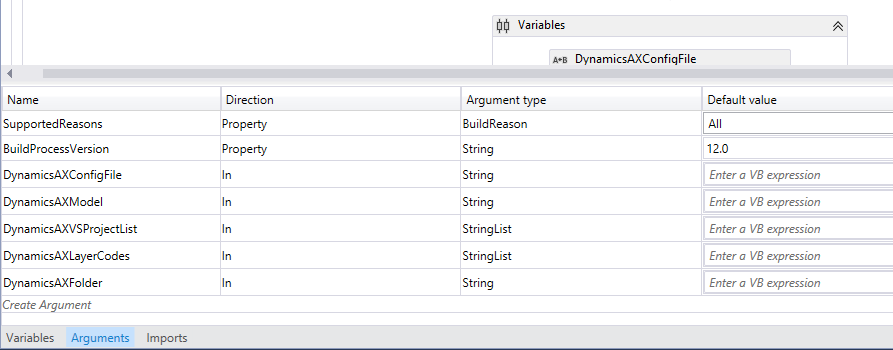
The Arguments of the process allow us to define input parameters, which we can pass to the process when we choose this template in the Build Definition, when creating it. Very useful to have different Builds (different definitions) that, using the same template, perform different actions depending on the input parameters of each definition. For example, compile one Branch or another, or use different environments to compile depending on a configuration file:
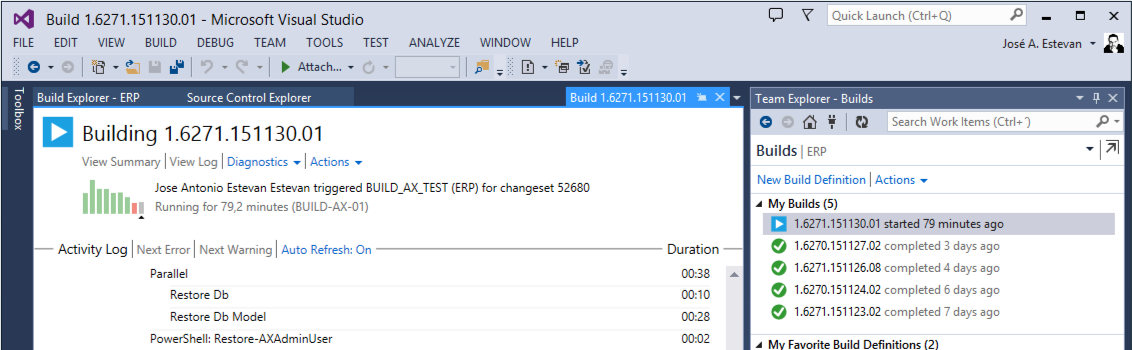
This is not included in the default template, so it will be up to us to modify it, either simply to change the paths and values appropriate to our environments, or to replace these values with variables as I have done, and from here there is no rule or silver bullet, everything depends on the effort we want to dedicate to the process and what we want to achieve with our processes. Once our template is finished, and even while we’re developing it, the process shows each of the activities it’s executing and the time it takes in each one. This will allow us to check what’s going on and in case of problems, know which of the activities has failed. A log of all executed Builds is stored, although we can change the retention policy in the definition since we probably don’t want to keep the result of all builds executed since always, but only those that are useful to us.
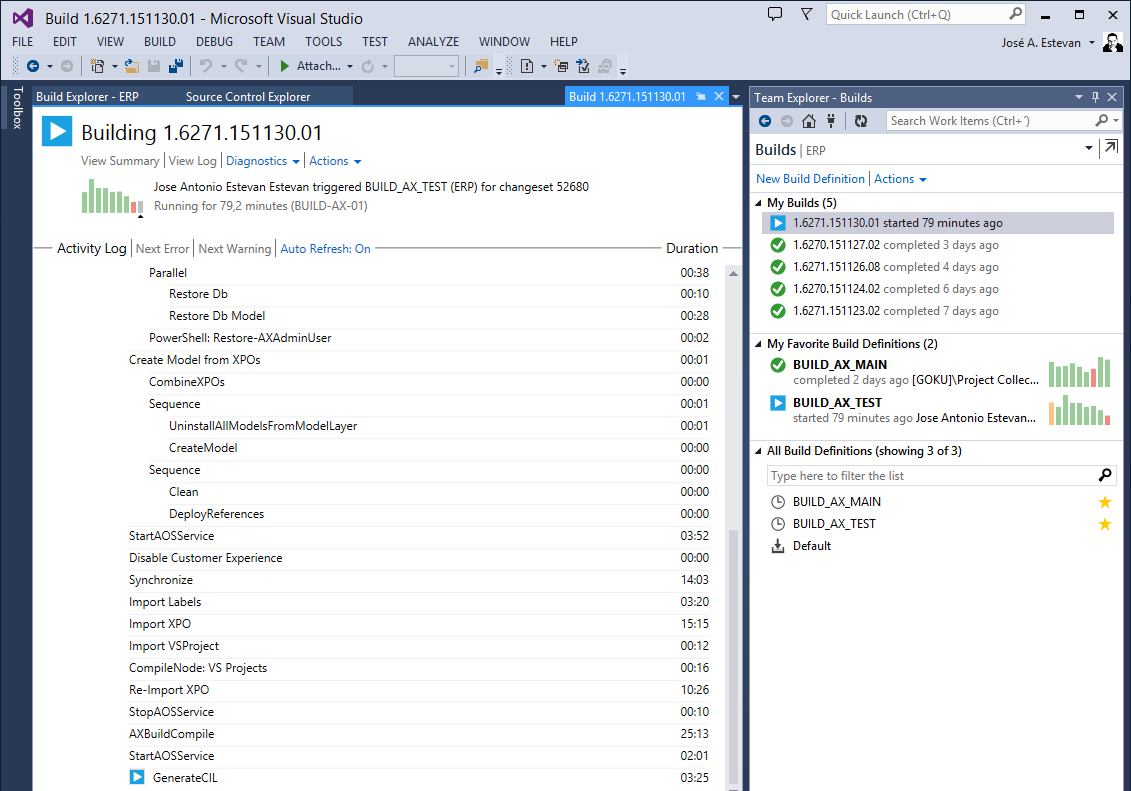
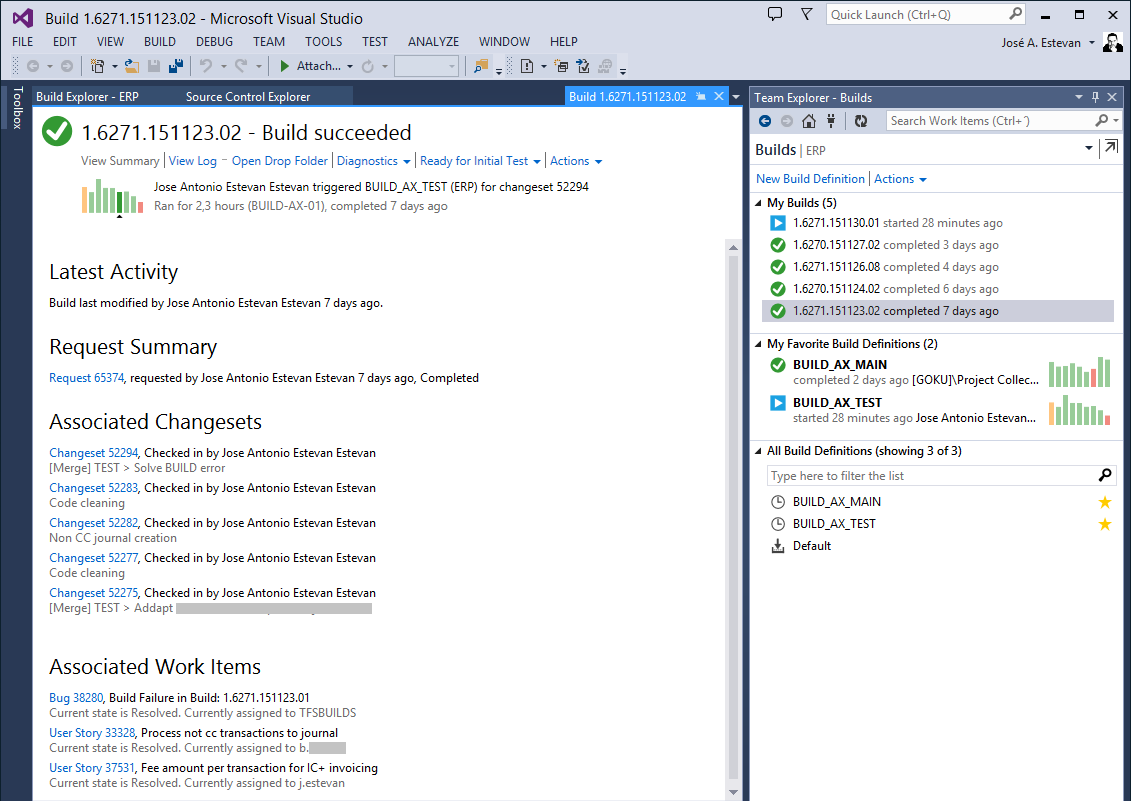
Whether the build terminates correctly or gives an error, a detailed report is displayed at the end that can be viewed both in Visual Studio and on the TFS website, whether we use TFS on premise or Visual Studio Team Services.
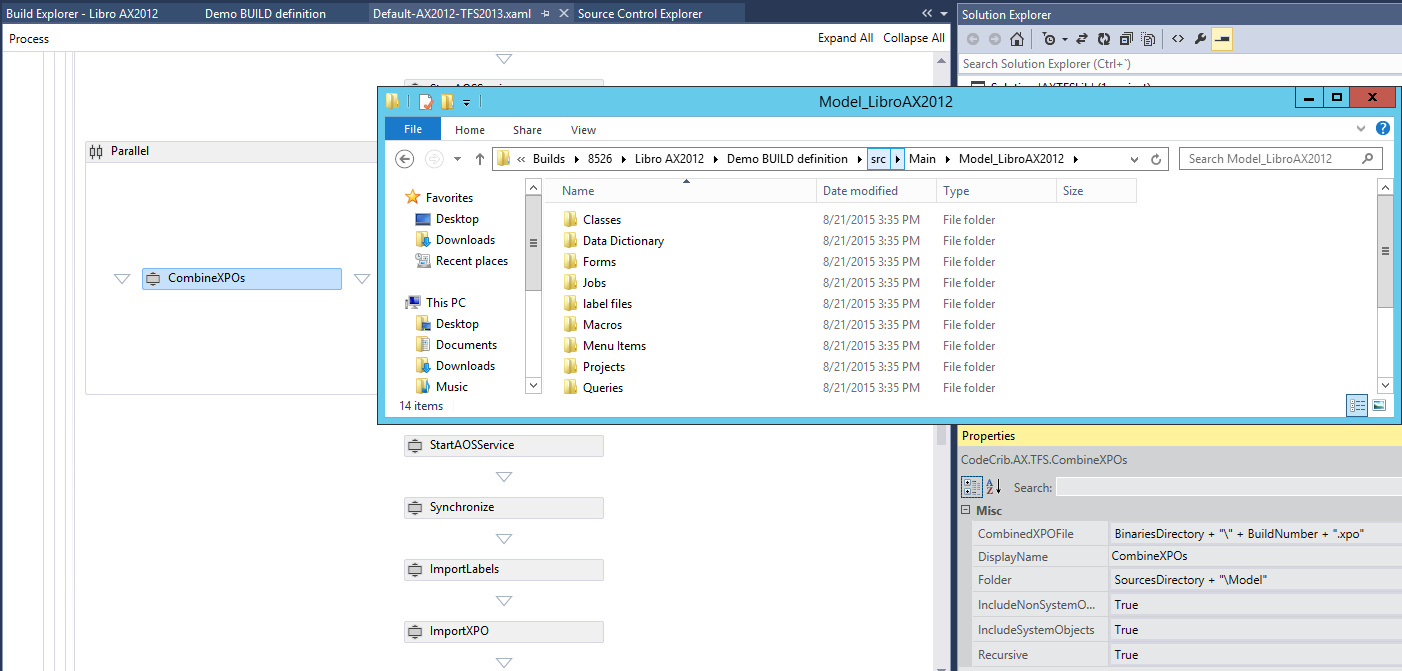
The Build also saves very useful information on the server’s hard drive (by default), or wherever we tell it to. It’s our responsibility to define what result we want to obtain from the process, which can range from simply compiling the code, an XPO with the objects, a model, a model store, etc… we can combine the activities to get what we want. In any case, we probably save this result to disk, where the process itself stores all the code downloaded from TFS, and the AX activities store temporary files used during the process. Furthermore, TFS stores a very complete log that includes detailed information for each activity, including input parameters and any output information, depending on the activity. These logs are very useful for debugging new templates when creating them, and also for diagnosing problems in real Builds that might fail.
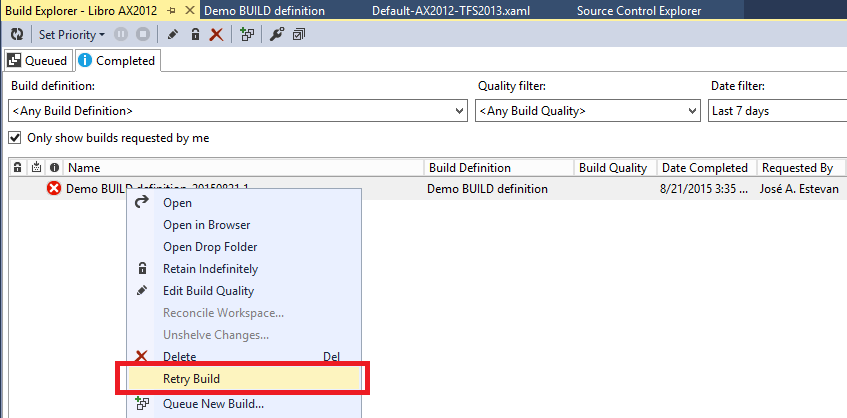
If a build fails, we can always re-run it using the Retry Build option in Visual Studio.
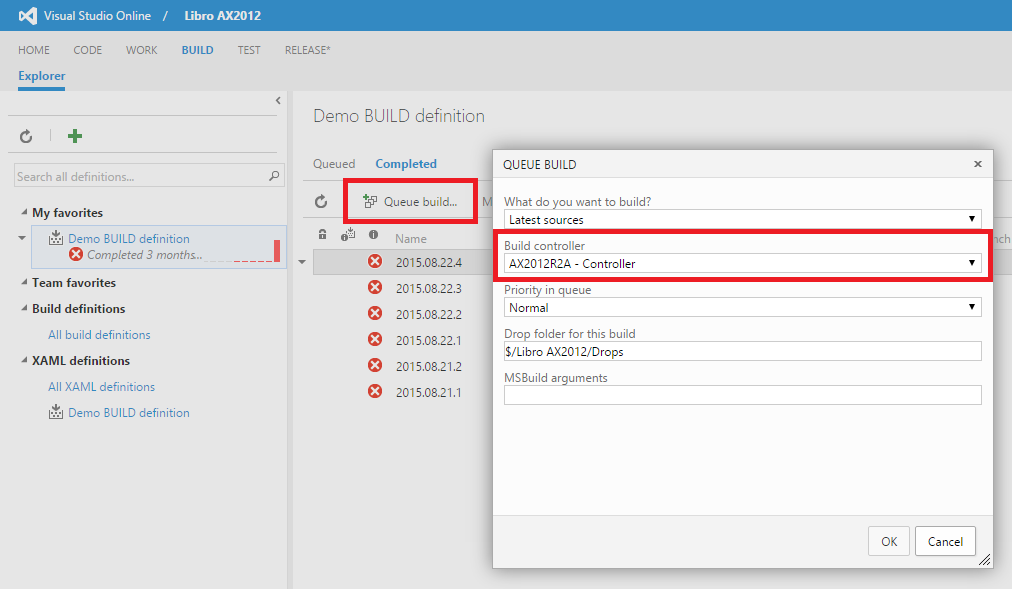
Or we can execute it directly from the web portal, very useful since we can run a new Build without needing access to the server where it runs. Normally the TFS website will be more accessible than the servers where the process runs.
Call to action!
It’s been a long time since I started writing this series and I hope it has been useful to someone, that some team now works more peacefully thanks to the techniques learned here, then all this work will have been worthwhile. Is that your case? Have these series of articles helped you? If so, please tell me by email, twitter, contact form,… anyway, however you want. I’m preparing another project related to this topic and it would help me to know your impressions. After all, this is worthless if it doesn’t turn out to be interesting for the community.
Thank you! :D
Posts in this series
- Automatic BUILD Processes with TFS and AX 2012 (2/2) (ALM-X)
- Automatic BUILD Processes with TFS and AX 2012 (1/2) (ALM-IX)
- Microsoft Dynamics AX 2012 Label Codes Using Team Foundation Server Branches (ALM-VIII)
- Version Control in Microsoft Dynamics AX 2012 Using Team Foundation Server Branches (ALM-VII)
- Source Code Control with TFS in Microsoft Dynamics AX 2012 (ALM-VI)
- Read Team Foundation Server Items from Microsoft Dynamics AX 2012 (ALM-V)
- Download Microsoft Dynamics AX 2012 Application from Team Foundation Server (ALM-IV)
- Microsoft Dynamics AX 2012 ALM with Team Foundation Server (ALM-III)
- Team Foundation Server 2010 Installation (ALM-II)
- Microsoft Dynamics AX 2012 Application Lifecycle Management (ALM-I)